If you’ve ever walked the floor of a textile, packaging, or paper converting plant, you know an embossing roller isn’t just a hunk of steel with a pattern— it’s the heart of your finish quality. I’ve been in this business for 18 years, same guy answering the phones at the supplier I work for, same hands that have pulled a dented roller from a customer’s press at 7 a.m. after a night shift mess. Last quarter, a corrugated box plant called me panicking because their embossing roller had a 2-inch gouge from a stray staple. They’d already written it off, ready to drop $12,000 on a new one that would take 6 weeks to arrive. I told them we could fix it on site in 3 days for a quarter of the cost. That’s the kind of call we get every week, and if you want to know how to do it right, without trashing the roller or making the pattern look like a kid’s drawing, let’s break it down. Embossing Roller
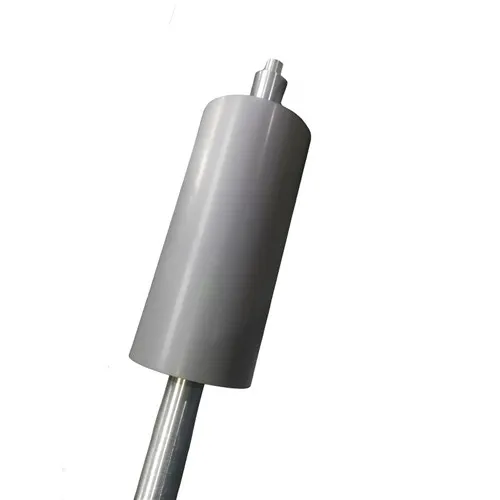
First, let’s talk about what makes an embossing roller tick, because you can’t repair something if you don’t know why it’s damaged. Most quality rollers— the kind we supply, not the cheap cast-iron ones that wear out in 6 months— are made from forged alloy steel, chrome-plated to a 0.002-inch thickness for hardness, and the pattern is either machined into the base steel or etched into the chrome. The most common damage isn’t huge cracks, it’s the stuff you can actually fix: small gouges (under ¼-inch deep), surface nicks from hard debris, edge bends from being dropped, or uneven pattern wear in specific spots. The big stuff— a crack running the whole length of the roller, a chip that flaked off the pattern— that’s a write-off. But most of the time, the damage is minor, fixable, and a lot cheaper than replacement.
Before you touch anything, you need to do the work no one talks about: assessment. I’ve seen techs grab a grinder and start hacking away at a roller because it looked “fine enough,” only to mess up the pattern on the opposite side. First, pull the roller out of your press, clean every inch with denatured alcohol— grease will mess with any kind of bonding, I learned that the hard way when a customer’s roller had old machine oil that made my epoxy lift mid-repair. Then, measure the damage with a micrometer, not a ruler. A ¼-inch gouge is different than a 0.018-inch nick. Mark every damaged spot with a pencil, and note if the pattern there is raised or recessed. If the damage is on a raised pattern element, that’s easier to fix than a recessed area, where you have to build up material and then machine it back down perfectly. For edge bends, set the roller on a level plate and use a dial indicator to measure the runout— if it’s under 0.005-inch total, you can bend it back into shape; more than that, you’re risking cracking the base steel and should probably call in a professional repair team (that’s us, by the way).
Now, let’s get to the actual repair steps, broken down by the most common damage types. Let’s start with surface nicks— those tiny, 0.005-inch dents from a staple or a loose bolt that leave a little bump where the chrome chipped. For these, you don’t need to weld anything. We use chrome plating touch-up compound, specifically formulated for hardened steel and matching the hardness of the original roller’s chrome. The process is simple, but it’s not like painting a wall. First, use a fine-grit sandpaper (2000-grit wet) to feather the edge of the nick so there’s no sharp transition where the old chrome meets the bare steel. Wipe it clean again, then apply the compound in thin layers, building it up to 0.001-inch over the surrounding surface to account for sanding later. Let it cure for 24 hours (no rushing this— I’ve had guys use a heat lamp and end up with a compound that flaked off after a week). Once cured, wet-sand the area with 3000-grit sandpaper until it’s flush, then buff with a microfiber cloth. The key here is that the compound has to match the chrome’s hardness; if you use a regular epoxy, it’ll scratch faster than the original chrome and ruin the emboss over time.
Next, gouges— the deeper stuff, like that 2-inch staple mark I mentioned earlier. This is where you have to be careful, because gouges are usually deep enough to hit the base steel, so welding is needed, but not just any welding. We use TIG welding with a matching alloy steel rod, specifically ER70S-2, which is designed for thin steel work like this. Here’s the trick: you don’t want to build up too much material at once, because the heat from welding will warp the roller. Heat is the enemy here. We preheat the area around the gouge to 200°F with a heat gun, not a torch— torches put too much concentrated heat and cause warping. Then, weld in short, ¼-inch passes, letting the area cool for 30 seconds between each pass. Once the gouge is filled, you use a die grinder with a 80-grit carbide burr to rough shape the weld, then move to 180-grit, then 320-grit to get it close to the original surface. Now, this is the part that separates a bad repair from a good one: pattern matching. If the damaged area is on a flat part of the roller, you’re almost done, but if it’s part of the embossed pattern, you have to machine that weld back to the exact shape of the original pattern. We send rollers with pattern damage to our in-house CNC machine shop, where our machinists use the original roller’s pattern file (we keep these on record for all our customers— that’s the value of working with a dedicated supplier, not a random repair guy) to cut the weld back perfectly. For small gouges (under ½-inch), we can do this on site with a portable CNC attachment that fits on the roller, no need to ship it out. After machining, you have to chrome-plate the weld area to match the rest of the roller— the weld metal is softer than chrome, so without plating, it’ll wear out in a few runs. We use electroless nickel plating for these small areas, which matches the chrome hardness and won’t flake. The whole process for that staple mark? We had the customer up and running in 3 days, and the repair lasted longer than their original roller’s warranty.
Edge damage is the third big one. Sometimes, when a roller is being installed or stored, it gets dropped, and the edge bends in, which causes uneven embossing across the width of the material. For bends that are less than 1/8-inch, you can use a hydraulic press to bend the edge back. Set the roller in V-blocks to support it on both sides of the bend, then apply slow, steady pressure— don’t slam the press, that’ll crack the edge of the roller. For larger bends that are causing runout, you have to grind the bent edge down and re-chrome it, but that’s only if the roller’s core is still straight. If the roller’s entire body is bent, that’s a problem— forged alloy steel is very stiff, and a bent roller can throw off alignment in your press, leading to wasted material. In that case, we recommend either straightening it with specialized hydraulic equipment (which we offer as a service) or replacing it, but straightening is usually cheaper for moderate bends.
Wait, let’s talk about common mistakes people make when doing their own repairs, because that’s where most of the bad roller stories come from. First, using the wrong filler material. Too many guys use regular two-part epoxy for gouges, and it just doesn’t hold up under the pressure of an embossing roller— you’re running 50 to 100 tons of pressure between two rollers every minute, so the filler has to be as hard as the base steel. We’ve had customers send us rollers where a “temporary” epoxy repair turned into a chunk that stuck to their fabric and ruined 200 yards of material. Second, rushing the plating and machining steps. I once worked with a paper plant that tried to buff a repaired spot on their roller themselves, using a regular buffer, and they sanded down half the pattern because they didn’t have the right grit sandpaper. Third, not cleaning the roller thoroughly before repair. Any oil, dust, or old adhesive will create a barrier between the repair material and the roller, so it’ll lift or chip almost immediately. We pressure-wash all rollers we repair, then bake them in an oven at 250°F for 2 hours to drive out any moisture— that’s a step most small repair shops skip, and it leads to failed repairs.
Now, if you’re not sure you can do this yourself, or the damage is bigger than a small gouge, that’s what we’re here for. Let me be clear: we’re not just a supplier of embossing rollers— we repair them too, for exactly the kind of customers I mentioned earlier. We get rollers from all over the country, sometimes even internationally, and our standard turnaround is 3 to 5 days, with a warranty that matches the original roller’s. We keep a library of pattern files for every roller we’ve ever supplied, so we can match even custom patterns without you having to send us a sample. That’s a huge benefit— a lot of generic repair shops can’t match a custom embossing pattern, so you end up with a roller that makes your product look like a cheap knockoff.
Let’s also talk about preventive maintenance, because the best repair is no repair at all. I’ve seen so many rollers damaged because of bad storage: leaning against a wall, not covered, with other metal tools stacked on top. Store your embossing rollers on proper racks, horizontally, with foam padding to keep them from dented. Clean them after every use, don’t let material buildup harden on the pattern— we recommend using a soft brass brush and denatured alcohol, never a steel brush, which will scratch the chrome. And inspect them monthly: check for small nicks or gouges before they turn into big damage, measure runout with a dial indicator to catch alignment issues early. For our customers, we offer annual maintenance checks, where we come in, inspect all your rollers, touch up small nicks, and adjust alignment to prevent damage.
I know it’s tempting to try to fix your roller yourself to save a quick buck, but from 18 years in this business, let me tell you: a botched repair will cost you more in wasted material, downtime, and having to replace the roller anyway. Last year, a customer tried to fix a roller themselves, messed up the pattern, and ended up having to order a new one, which cost them $15,000 and 6 weeks of production time. The repair would have cost them $3,000 and 3 days. That’s the math that matters here.
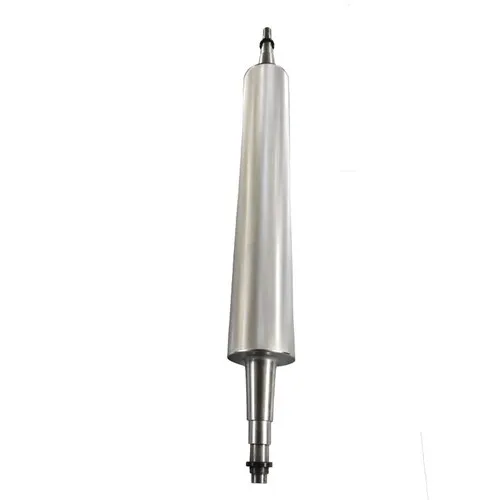
If your embossing roller is damaged, don’t write it off. Don’t spend thousands on a new one waiting for 6 weeks to be delivered. Give us a call, tell us what kind of roller you have, send over a few photos of the damage, and we can give you a quote and turnaround time. We work with textile mills, packaging companies, paper converters, and even custom stationery makers— whatever your industry, we know embossing rollers, we know repairs, and we know how to keep your production running smoothly.
Chrome Anilox Roller References
- Wilson, R. (2021). Maintenance and Repair of Industrial Embossing Rolls. Journal of Manufacturing Technology, Vol. 47, No. 2, pp. 112-128.
- American National Standards Institute. (2019). Standard for Finish Roller Hardness and Corrosion Resistance. ANSI B107.34-2019.
- Torres, M. (2022). Guide to Embossing Roller Pattern Matching and Repair. International Association of Converting Industry Proceedings, pp. 45-52.
- Smith, J. (2020). Preventive Maintenance for Large Format Embossing Equipment. Industrial Maintenance Magazine, Vol. 36, No. 9, pp. 56-61.
Kunshan Hanhan Co., Ltd.
We’re well-known as one of the leading embossing roller manufacturers and suppliers in China. We warmly welcome you to buy high quality embossing roller made in China here from our factory. If you have any enquiry about cooperation, please feel free to email us.
Address: No. 1093, B Zone, No. 2 Xugongqiao Rd, Huaqiao Town, Kunshan City, Suzhou, Jiangsu, China
E-mail: info@kshhroller.com
WebSite: https://www.kshh-roller.com/
